

How to Dry Your Hair Properly: Proven Ways to Keep Your Hair Healthy and Shiny
Blow-dry or let it air-dry? From what distance, with which airflow and how to avoid frizz - Anna Nowak-Ibisz step by step on drying hair.

You know the dilemma: without a hair dryer your hair turns to straw, with any old hair dryer - a bird's nest. I've been reading posts like this on forums for years and I understand them perfectly, because for most of my life I dried my hair in the morning, in a rush, before heading to the set. This is Anna Nowak-Ibisz, co-founder of SkinVibe. The good news is that between straw and a bird's nest there really is a third way, and it doesn't take a hairdresser's talent or an hour in front of the mirror. It takes technique: a few steps in the right order, the right distance and a temperature your hair won't hold against you. I'll lay it all out for you in detail - step by step, with techniques for volume and a list of the mistakes I see most often.
IN SHORT
- The myth that "air-drying is the healthiest" has been disproved by research: hair soaked with water for two hours or more gets damaged more than hair dried sensibly with a hair dryer.
- Sensible drying has three ingredients: distance (15-30 cm), keeping the dryer moving and a moderate temperature - a trichologist says it plainly: a maximum of 90°C, the ideal is around 70°C.
- The order of steps: blot with a towel without rubbing, detangle, dry from roots to ends, from top to bottom, and finish with 30-60 seconds of cool air.
- Frizz and static are charges on the surface of the hair - that's why ionization makes a real difference, and drying downward along the cuticle smooths the strands.
- Curls are dried differently from straight hair: the diffuser is held still, section by section, without waving it from side to side.
Blow-dry or let your hair air-dry?
Contrary to intuition, the biggest enemy of your hair is not the hair dryer but water. A study published in the Annals of Dermatology compared five drying methods and found something that turns common beliefs at home upside down: air-drying hair stays in contact with water for two hours or more, and soaking for that long damages its internal binding more than a hair dryer held a dozen or so centimeters from the head and kept constantly moving.
Why does this happen? Wet hair swells and its cuticles open up. In this state it is at its most vulnerable: prone to stretching, friction and breakage. The longer this state lasts, the more small damage builds up. That's also why I advise against going to bed with wet hair - all night long you rub an open, swollen cuticle against the pillow, and in the morning you wonder where the frizz came from.
The conclusion is simple and, for many of you, liberating: properly done drying is not "frying your hair", it's shortening the time when the hair is at its weakest. The whole art lies in the words "properly done" - and that's what the rest of this guide is about.
How to dry your hair properly, step by step
How do you dry your hair properly? Blot it with a towel, detangle it, dry from roots to ends with warm, not hot, air directed downward along the cuticle, and finish with 30-60 seconds of cool air. The order matters, because each step prepares the next one. Here's the routine I follow myself - it takes a few minutes, and your hair pays you back with smoothness all day:
- Blot, don't rub. Press the towel against your hair like a sponge instead of rubbing it. Rubbing a wet, open cuticle is a straight road to frizz and split ends. You can swap a regular towel for a cotton T-shirt - it's gentler.
- Detangle from the ends. Use a wide-tooth comb, starting at the bottom and working your way up. On tangled hair the air works unevenly and drying takes twice as long.
- Apply heat protection. Especially if you reach for warmer settings or plan to use a straightener or curling iron after drying.
- Divide your hair into sections. Two clips are enough. Sections mean less air wasted on strands you will end up over-drying again anyway.
- Start at the roots. The scalp and roots take the longest to dry, and the ends - the oldest and weakest part of the hair - the shortest. If you dry from the bottom up, you'll over-dry the ends before the roots even have a chance to dry.
- Keep your distance and keep moving. In the Annals of Dermatology study mentioned above, drying from around 15 cm with constant movement came out best, and dermatologist Marcin Zakrzewski recommends 20-30 cm and directing the airflow from top to bottom. In practice: stay within 15-30 cm and don't hold the airflow in one spot - local overheating is damage you don't see right away, but your hair remembers it.
- Finish with cool air. 30-60 seconds of cool air seals the cuticle, sets the style and adds shine. It's the cheapest "shine booster" in the world - you have it in every hair dryer with this feature.

What air and what temperature should you dry your hair with?
Dry your hair with warm air at a temperature of up to around 70°C and finish with cool air; save the hottest setting for special situations. The rule is shorter than it seems: warmer at the start, cooler at the end, and hot - wisely. In our podcast, trichologist Agnieszka Trepka says it plainly: a hair dryer should work at a maximum of 90°C, and the ideal is around 70°C. Dermatologist Marcin Zakrzewski points to a similar limit, recommending airflow up to around 70°C.
Watch the whole conversation - it's 47 minutes of solid facts about hair, with no marketing nonsense:

After you click, YouTube (Google) plays the video.
How does this translate to the buttons on your hair dryer? Here's the cheat sheet I use myself:
| Airflow | When to use it |
|---|---|
| Hot | Briefly, at the start, on wet roots - always at a distance and on the move. Never on the ends. |
| Warm | The main part of drying and styling. This is where your hair spends the most time, so this temperature decides its condition. |
| Cool | The finish: seals the cuticle, sets the style, adds shine. Also for fine, delicate hair throughout the whole drying. |
When designing our Aurea Family x Plasma hair dryer, we took these limits to heart: we set the warm airflow to 55°C, and a sensor checks the temperature a hundred times per second so there are no spikes. In practice this means most of the drying happens below the threshold the trichologist and the dermatologist talk about - without you having to keep an eye on anything.

One family note, because you ask about it often: children's hair and scalp are thinner and more sensitive than ours. That's why the children's mode in Aurea has a hard limit of 65°C and a lower motor speed. If you dry your child's hair with a regular hair dryer, choose the lowest temperature and increase the distance - the fact that drying then takes longer is not a drawback, it's exactly the safeguard.
How to dry your hair so it doesn't frizz or get static?
To keep your hair from frizzing and getting static, dry it downward along the cuticle, at a lower temperature, with ionization or plasma, and finish with cool air; don't over-dry the ends. Frizz is physics, not fate. During drying and friction, electrostatic charges build up on the surface of the hair, which make the strands literally push each other away - and an open cuticle amplifies this effect. In winter, with dry air, it becomes a daily battle. I've covered winter static, hats, brushes and pillowcases separately in my article about static hair. If your hair frizzes despite all this, check its porosity: I've laid out the temperature and technique for each type in my guide on hair porosity.
Once we know the mechanism, we know the solutions too:
- Direction: from top to bottom. Hair cuticles lie like roof tiles - an airflow directed from roots to ends smooths them down, an airflow "against the grain" lifts them up.
- Don't over-dry. Hair dried "bone dry" gets the most static. Leave it a little moisture by finishing with cool air.
- Ionization does the job. Negative ions neutralize charges on the surface of the hair and help seal the cuticle - hair is smoother and stops "flying away". In our Libra AirLoom hair dryer we put in a stream of 200 million negative ions per cm³, and in Aurea we went one step further: plasma technology generates one billion positive and negative ions per cubic centimeter of air, neutralizing charges even more effectively. I've explained exactly how it works in a separate article about plasma technology in hair dryers.

And one more thing hardly anyone talks about: if your hair frizzes despite the right technique, the culprit is sometimes the brushing during drying itself. Brush a strand only while you are directing the airflow along it from top to bottom - brushing hair that is already dry and static lifts the cuticle back up.
Volume: how to lift your hair at the roots
Fine hair has the opposite problem to frizzy hair: instead of flying away, it sticks to the head. Volume is built in one place - at the roots - and in the first minutes of drying, while the hair is still damp.
Three techniques that really work:
- Lift the strand and dry the roots from underneath. Use your fingers or a brush to lift the strand up and direct warm air at the roots themselves. Hair sets in the position in which it dried.
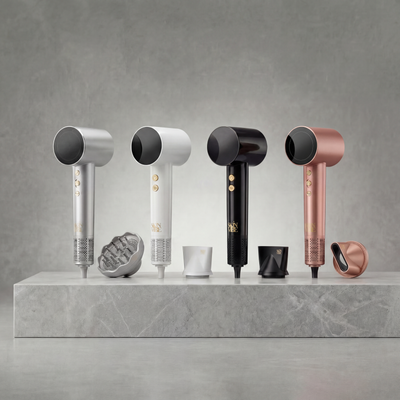
- A concentrator for precision. A narrow nozzle focuses the airflow exactly where you need it. The Aurea and Libra sets include two concentrators: a basic one for everyday drying and a professional one that shapes the airflow even more precisely and lifts the hair at the roots.
- Head down - but briefly. A minute of drying with your head tipped forward lifts the roots like nothing else. Just don't overdo it: hair dried "against the grain" of the cuticle for a long time starts to frizz.
At the end, set the effect with cool air directed at the roots. And if your ponytail or bun still looks flat - for putting my hair up I use our PonyGadget, a small accessory that lifts the updo from the inside. Sometimes the simplest solutions are the most effective. I show how it works and how to put it in, in a separate post about PonyGadget.
Curls and waves: we hold the diffuser still
Curly hair has its own rules, and it's with curly hair that I most often hear the question "what do I even need this diffuser for?". Well, for the curls to survive drying. A concentrated airflow breaks up the curl pattern and turns curls into fluff - a diffuser disperses the air and dries gently, preserving the natural shape of the wave. Which diffuser to choose for your curl type and how to go through the whole drying process step by step, I've described in a separate guide to hair dryers with a diffuser for curly hair.
The technique is different from straight hair, and here I hand over to the dermatologist: Marcin Zakrzewski recommends placing the diffuser against the head and holding it still for a minute or two, without waving the dryer from side to side. Go through your whole head like this, section by section. Constant movement, so important with a concentrator, no longer applies with a diffuser, because dispersed air doesn't heat one spot.
On top of that, three little things that make a difference: dry your curls with your head tipped forward or by lifting sections toward the roots with the diffuser, don't brush them during drying (a brushed-out curl is a lost curl) and finish with cool air. For this we designed a wave diffuser in Aurea - I fine-tuned it personally, and it separates strands better than a classic one, so curls frizz less.
If you curl your hair or make waves right after drying, you can do it with one device: a hot air styler first pre-dries the hair with a nozzle and then wraps damp strands with warm air. I've described how to dry and curl your hair with one device.
Does the equipment matter? It does - but technique comes first
I'll tell you something you don't expect from the co-founder of a hair dryer brand: the best hair dryer in the world won't fix bad technique. It works better the other way round - good technique will squeeze a decent result even out of average equipment. But a few things in a device really help: temperature control (so you know how many degrees are hitting your hair), ionization or plasma (against frizz), cool air and a proper set of nozzles. Separate drying rules apply after keratin straightening and nanoplasty: always with a hair dryer, until completely dry, downward, without a diffuser; I've laid them out in my article on hair after keratin and nanoplasty.
See for yourself what it looks like in practice:

After you click, YouTube (Google) plays the video.
If you are about to choose a new device, I've written a separate, comprehensive guide on how to choose a hair dryer - with the parameters that matter and those that are just marketing. And you can compare our models side by side on the hair dryer comparison page. And if you don't want to compare anything yourself, take the short matching quiz: 90 seconds and you get a model matched to your hair.
The most common hair drying mistakes
I promised you a list of mistakes, so here they are in one place - all from real life, not from a textbook:
- Rubbing vigorously with a towel. Rubbing an open, wet cuticle is the start of frizz before you even switch on the hair dryer.
- Drying tangled hair. The air works unevenly, drying takes twice as long, and knots turn into broken hairs.
- A hot nozzle right against the head. An airflow held in one spot at close range means local overheating - invisible at first, adding up every time.
- Drying from the ends. The weakest part of the hair then gets the most heat, and the roots stay wet anyway.
- Over-drying "bone dry" and brushing dry hair. Hair stripped of its last bit of moisture gets the most static, and a brush on dry strands lifts the cuticle back up.
- Leaving hair wet for hours - with going to bed with wet hair at the top of the list. This is exactly the scenario that came out worse in research than using a hair dryer.
Healthy drying is a habit, not a talent
Let's go back to the dilemma from the start: straw or a bird's nest? Neither. Blot, detangle, dry from the roots from top to bottom, at a distance and on the move, warm instead of hot, with a cool finish at the end. That's it. After two weeks this order becomes second nature and stops being a "technique" - it simply becomes the way you dry your hair.

You'll find all our hair dryers in the hair dryer collection. And if after reading this guide something still doesn't add up - write to us, we read every message. The most common mistake is making do; your hair really notices the difference between "as fast as possible" and five minutes of attention. 🤍
Anna Nowak-Ibisz, co-founder of SkinVibe
Frequently asked questions about drying hair
Does a hair dryer damage hair?
It's not the hair dryer that damages hair, but the way it's used. A study published in the Annals of Dermatology showed that drying from a distance of around 15 cm with constant movement damages hair less than leaving it wet for two hours or more. What does damage it is a hot nozzle pressed against one strand, too high a temperature and drying tangled hair that hasn't been blotted.
Is it better to blow-dry your hair or let it air-dry?
For longer hair, drying with a hair dryer while following the rules is healthier: wet hair swells, its cuticle opens, and the longer this state lasts, the more damage builds up. Air-drying often means more than two hours in this weakest state. Very short hair that dries in a dozen or so minutes can safely dry on its own.
What air should you dry your hair with - warm or cool?
Ideally in sequence: warm air does the main work, hot air is only used briefly on wet roots, and cool air finishes the drying. Trichologist Agnieszka Trepka points out that a hair dryer should heat up to a maximum of 90°C, and the optimum is around 70°C. Fine and delicate hair can be dried with cool air only - it takes longer, but it's the safest for it.
Can you sleep with wet hair?
I advise against it. Wet hair has an open cuticle and is most vulnerable to mechanical damage, and all night long it rubs against the pillow. On top of that, in the morning you get straw instead of a hairstyle. If you wash your hair in the evening, dry it at least until it's slightly damp, finishing with cool air.
How to dry fine and delicate hair?
At a low temperature or with cool air only, from a greater distance and with the weakest airflow your hair dryer offers. Fine hair quickly gets over-dried and static, so ionization helps most here. You'll build volume by drying the roots with the strand lifted - and an accessory that lifts the ponytail from the inside will save your updo.
Does drying your hair upside down add volume?
Yes, and noticeably so, because the roots dry in a lifted position. Use this technique briefly, for a minute at the start of drying - directing the airflow "against the grain" of the cuticle for a longer time ends in frizz. Set the effect with cool air directed at the roots once you are back in a normal position.


